
RICH User Guide
Complete RICH tutorial with instructions for creating projects, managing data, blockchain certificates, and IP protection.

1. Creating an Account
Sign up with your email
Go to https://app.researchintegritychain.com/sign-up and create your account in a few seconds using your academic or personal email address. Enter your full email address and press "Enter" on the keyboard or click the "Continue with email" button.

You should receive a verification code in your email.

Copy the code received in the email, paste it into the corresponding field on the registration page and press "Enter" on the keyboard or click the "Verify Email Address" button.

🎉 Congratulations! You have successfully created a personal account in RICH!

Sign up with your Google account
Go to https://app.researchintegritychain.com/sign-up and create your account in a few seconds using your Google account. Click the “Continue with Google” button on the sign-up page.

Type in your email address registered with Google, authorize with your password and 2FA (two-factor authentication if available).

🎉 Congratulations! You have successfully created a personal account in RICH!
2. Creating a Project
Creating your first project
To create your first project, log in to your RICH account and on the main"Research" dashboard, click the "Create new research" button.

Then follow the instructions for adding project metadata here.
Adding a new project
Log in to your RICH account, and on the main "Research" dashboard, click the "Create new research" button.

Then follow the instructions for adding project metadata here.
Adding project metadata
⚠️ Remember! You can always change the metadata of a created project (title,description, related research fields) except in cases when you issue an intellectual property certificate (IPC), after which any actions with the project content and its metadata become impossible, except for viewing its content and partial or complete transfer of intellectual property rights to the completed research (coming soon).

Adding project co-authors
⚠️ Remember! You can always add/remove project co-authors and its individual stages except in cases when you issue an intellectual property certificate (IPC) or a project stage certificate (PSC), after which any actions with the project content and stages, their metadata and co-authors become impossible, exceptfor viewing their content and partial or complete transfer of intellectual property rights to the completed research (coming soon). To add project co-authors, click the "Add Author" button.

Add the email address, first name and last name of the co-author.

Added co-authors, including those from external organizations, receive acorresponding email notification with an invitation to register or, if they are already registered, to review the corresponding project and start working.
Registered co-authors can:
- Change metadata (title, description, related research fields) of the project;
- Create project stages;
- Change metadata (title and description) of project stages (to which theywere invited or which they created);
- Upload data to project stages (to which they were invited or which theycreated);
- Download data from project stages (except deleting them);
- Receive intellectual property certificates (IPC) for completed projects andproject stage certificates (PSC);
- Issue intellectual property certificates (IPC) and project stage certificates(PSC) can only be done by the project administrator (the one who createdthe research project).
Completing project initialization
Complete the creation of the research project – click the "Create research" button.

🎉 Congratulations, you have created a research project with RICH!
3. Managing Project Stages
⚠️ Remember! You can always change the metadata of a created project stage (title, description, co-authors and uploaded data) except in cases when you issue a project stage certificate (PSC), after which any actions with its content and metadata become impossible, except for viewing its content.
Adding a project stage
You can add a research stage only to a created project (1) through the project "Details" or (2) through "Add Data" on the project card (shortcut).

If you are creating a stage through project "Details", scroll down the project page and click "Create new stage".

If you are creating a stage through "Add Data" on the project card (shortcut), click "Add a new stage" in the pop-up message that appears.

Regardless of the chosen path, through "Add Data" (shortcut) or through the project "Details", add the stage title and description, specify relevant co-authors added to the research project earlier, upload corresponding data, and complete the creation of a new project stage by clicking "Create stage".

Deleting a project stage
⚠️ Remember! You can always delete a project stage and corresponding data (title, description, co-authors and uploaded data) except in cases when you issue a project stage certificate (PSC), after which any actions with its content and metadata become impossible, except for viewing its content.
Regardless of whether you delete a stage or not, all its interaction history between the author and co-authors remains in the cryptographic records of the research project and becomes its integral part when you issue an intellectual property certificate for the completed project (IPC). To delete a research stage, open the page of the selected research project by clicking "Details" on its card.

Scroll down the selected project page and click the "Delete" icon next to the corresponding stage you want to delete.

Confirm the deletion of the selected project stage by clicking the "Delete stage" button.

4. Managing Co-Authors
⚠️ Remember! You can always add new and/or remove project co-authors except in cases when you issue an intellectual property certificate (IPC) or a project stage certificate (PSC), after which any actions with the project content and/or stages, their metadata, data and co-authors become impossible, except for viewing their content and partial or complete transfer of intellectual property rights to the completed research (coming soon).
Adding project co-authors
You can add co-authors to a project (1) through project "Details" or (2) through "Project menu" on the selected project card.

If you are adding co-authors through project "Details", click "Edit" on the selected research project page.

If you are adding co-authors through "Project menu" on the project card, click "Edit" in the popup message that appears.

Regardless of the chosen path, through "Details" or through project "Project menu", click "Add Author" to add a co-author to the selected project.

Enter the email address, first name and last name of the co-author, and click "Save changes" to save the corresponding changes.

Resending co-author invitation
To resend an invitation to a co-author, go to the editing card of the selected project (see here) and click "Resend" next to the corresponding co-author.

Removing co-author from project
⚠️ Remember! All metadata of published stages and projects including specified co-authors (when you issue an intellectual property certificate (IPC) or a project stage certificate (PSC) cannot be changed. In addition, any changes in the metadata and data of the research project and its stages are instantly registered and protected by cryptographic records, which subsequently form the basis of the intellectual property certificate (IPC) and project stage certificates (PSC). To remove a co-author from a project, go to the editing card of the selected project (see here) and click the corresponding icon next to the selected co-author and click "Save changes" to save the corresponding changes.

Adding stage co-authors
First add the desired co-authors to the selected project (see here), then click "Details" on the project card.

Scroll down the selected project page and click the "Edit" icon.

Click the corresponding checkbox next to the co-author and click "Save changes" to save the corresponding changes.

Removing co-author from stage
⚠️ Remember! All metadata of published stages and projects including specified co-authors (when you issue an intellectual property certificate (IPC) or a project stage certificate (PSC) cannot be changed. In addition, any changes in the metadata and data of the research project and its stages are instantly registered and protected by cryptographic records, which subsequently form the basis of the intellectual property certificate (IPC) and project stage certificates (PSC). Go to the project card, scroll down the page, click the "Edit" icon next to the selected stage, uncheck the corresponding checkbox next to the co-author and click "Save changes" to save the corresponding changes (see here).
5. Managing Data
Upload files of any type – the system automatically generates unique cryptographic hashes with comprehensive metadata for each file, stage, project, and interaction of all co-authors with them. Your actual content remains private and confidential on protected Amazon servers until you provide special permission for its distribution (Public and Private publication modes). By default, all created projects and their data are published in private mode until you change their status to Public in the project settings (coming soon). ⚠️ Remember! You can always upload or delete uploaded data after creating a research stage except in cases when you issue an intellectual property certificate (IPC) or a project stage certificate (PSC), after which any actions with the project content and/or stages, their metadata, data and co-authors become impossible, except for viewing their content and partial or complete transfer of intellectual property rights to the completed project (coming soon).
Changing project metadata
You can change project metadata in two ways: (1) through project "Details" or (2) through "Project menu" on the project card.
If you are changing metadata through project "Details", click "Edit" on the selected project page.
If you are changing metadata through "Project menu" on the project card, click "Edit" in the popup message that appears.
Regardless of the chosen path, through "Details" or through project "Project menu", change the metadata of the selected project (title, description, and research directions) and click "Save changes" to save the corresponding changes.


Changing stage metadata
To change project stage metadata, click "Details" of the selected project.

Scroll down the project page, select the corresponding stage for making changes and click the "Edit" icon.

Change the metadata of the selected project stage (title and description) and click "Save changes" to save the corresponding changes.

Uploading data to project stage
You can upload data to a project stage in two ways: (1) through project "Details" or (2) through "Add Data" on the project card (shortcut).
If you are uploading data to a stage through project "Details", scroll down the selected project page, select the corresponding stage for making changes and click the "Edit" icon.
If you are uploading data to a stage through "Add Data" on the project card (shortcut), click "Select stage to edit" in the popup message that appears.

Select the corresponding project stage from the list of existing ones to which you want to upload data.

Click "Edit selected stage".

Regardless of the chosen path, through "Add Data" (shortcut) or through project "Details", upload data to the selected project stage – click "Attach new files" and select the necessary files from the corresponding directory or drag and drop files into the corresponding dialog window.

Click "Save changes" to save the corresponding changes.

Deleting uploaded data
To delete uploaded data from a project stage, click "Details" on the selected project card.
Scroll down the selected project page, select the corresponding stage for making changes and click the "Edit" icon.
Click the "Delete" icon next to the selected file and click "Save changes" to save the corresponding changes.

6. Managing Certificates
Creating PSC (project stage certificate)
⚠️ Remember! After you issue an intellectual property certificate (IPC) for a project or a project stage certificate (PSC), any actions with the project content and/or stages, their metadata, data and co-authors become impossible, except for viewing their content and partial or complete transfer of intellectual property rights to the completed research (coming soon). To create a project stage certificate (PSC), click "Details" on the selected project card.
.webp)
Scroll down the project page, select the corresponding stage and click the "Submit" button.
.webp)
Confirm the completion of the stage by clicking the "Submit" button.
.webp)
Confirm the blockchain transaction by clicking the "Approve" and "All Done" buttons respectively.
Sharing PSC (project stage certificate)
To share a project stage certificate (PSC), click "Details" on the selected project card.
.webp)
Scroll down the selected project page, select the corresponding stage and click the "Details" button.
.webp)
To share a project stage certificate (PSC), (1) copy the blockchain hash of the project stage or (2) go to the public page with metadata of the conducted stage and share it accordingly. Soon, you will be able to download detailed certificates directly on the project stages card.
.webp)
Verifying PSC (project stage certificate)
Verifying your own PSC
To verify a project stage certificate (PSC), click "Details" on the selected project card, scroll down the selected project page, select the corresponding stage and click the "Details" button. Go to the public page with metadata of the completed research stage via the "View at Whitechain Explorer" link (see here). On the public Whitechain Explorer page you can see your unique blockchain hash of the research project stage.

To see the public metadata of the completed project stage, scroll down the Whitechain Explorer page and click the "View as UTF-8" button.

Now you can see the public metadata of the completed project stage.

Verifying third-party PSC
To verify a third-party project stage certificate (PSC), go to Whitechain Explorer at https://explorer.whitechain.io/, copy the blockchain hash of the stage certificate (for example"0x411fd298b5cc1e4958f23cb9b3df8f37013fca97d36b2c44a0a7a212afd16042"), paste it into the search window and click the "Enter" button.

On the public Whitechain Explorer page you can see your unique blockchain hash of the project stage.

To see the public metadata of the stage certificate, scroll down the Whitechain Explorer page and click the "View as UTF-8" button.

Now you can see the public metadata of the stage project certificate.
Creating IPC (intellectual property certificate)
⚠️ Remember! After you issue an intellectual property certificate (IPC) for a project or a project stage certificate (PSC), any actions with the project content and/or stages, their metadata, data and co-authors become impossible, except for viewing their content and partial or complete transfer of intellectual property rights to the completed research (coming soon). To create an intellectual property certificate (IPC), click "Details" on the selected project card.
Scroll down the selected project page and make sure that all project stages are completed.
.webp)
At the top of the selected project page, click the "Submit research" button.
.webp)
Confirm the completion of the project and issuance of the intellectual property certificate by clicking the "Submit" button.
.webp)
Confirm the blockchain transaction by clicking the "Approve" and "All Done" buttons respectively.
🎉 Congratulations on completing the project and issuing the intellectual property certificate!
.webp)
Sharing IPC (intellectual property certificate)
To share an intellectual property certificate (IPC), click "Details" on the selected project card.
You can share an intellectual property certificate (IPC) by (1) downloading and sharing the PDF certificate, (2) sharing the public page with project metadata on the RICH website, and/or (3) sharing the unique NFT hash and public page with project metadata on the Whitechain Explorer website.
Sharing PDF certificate
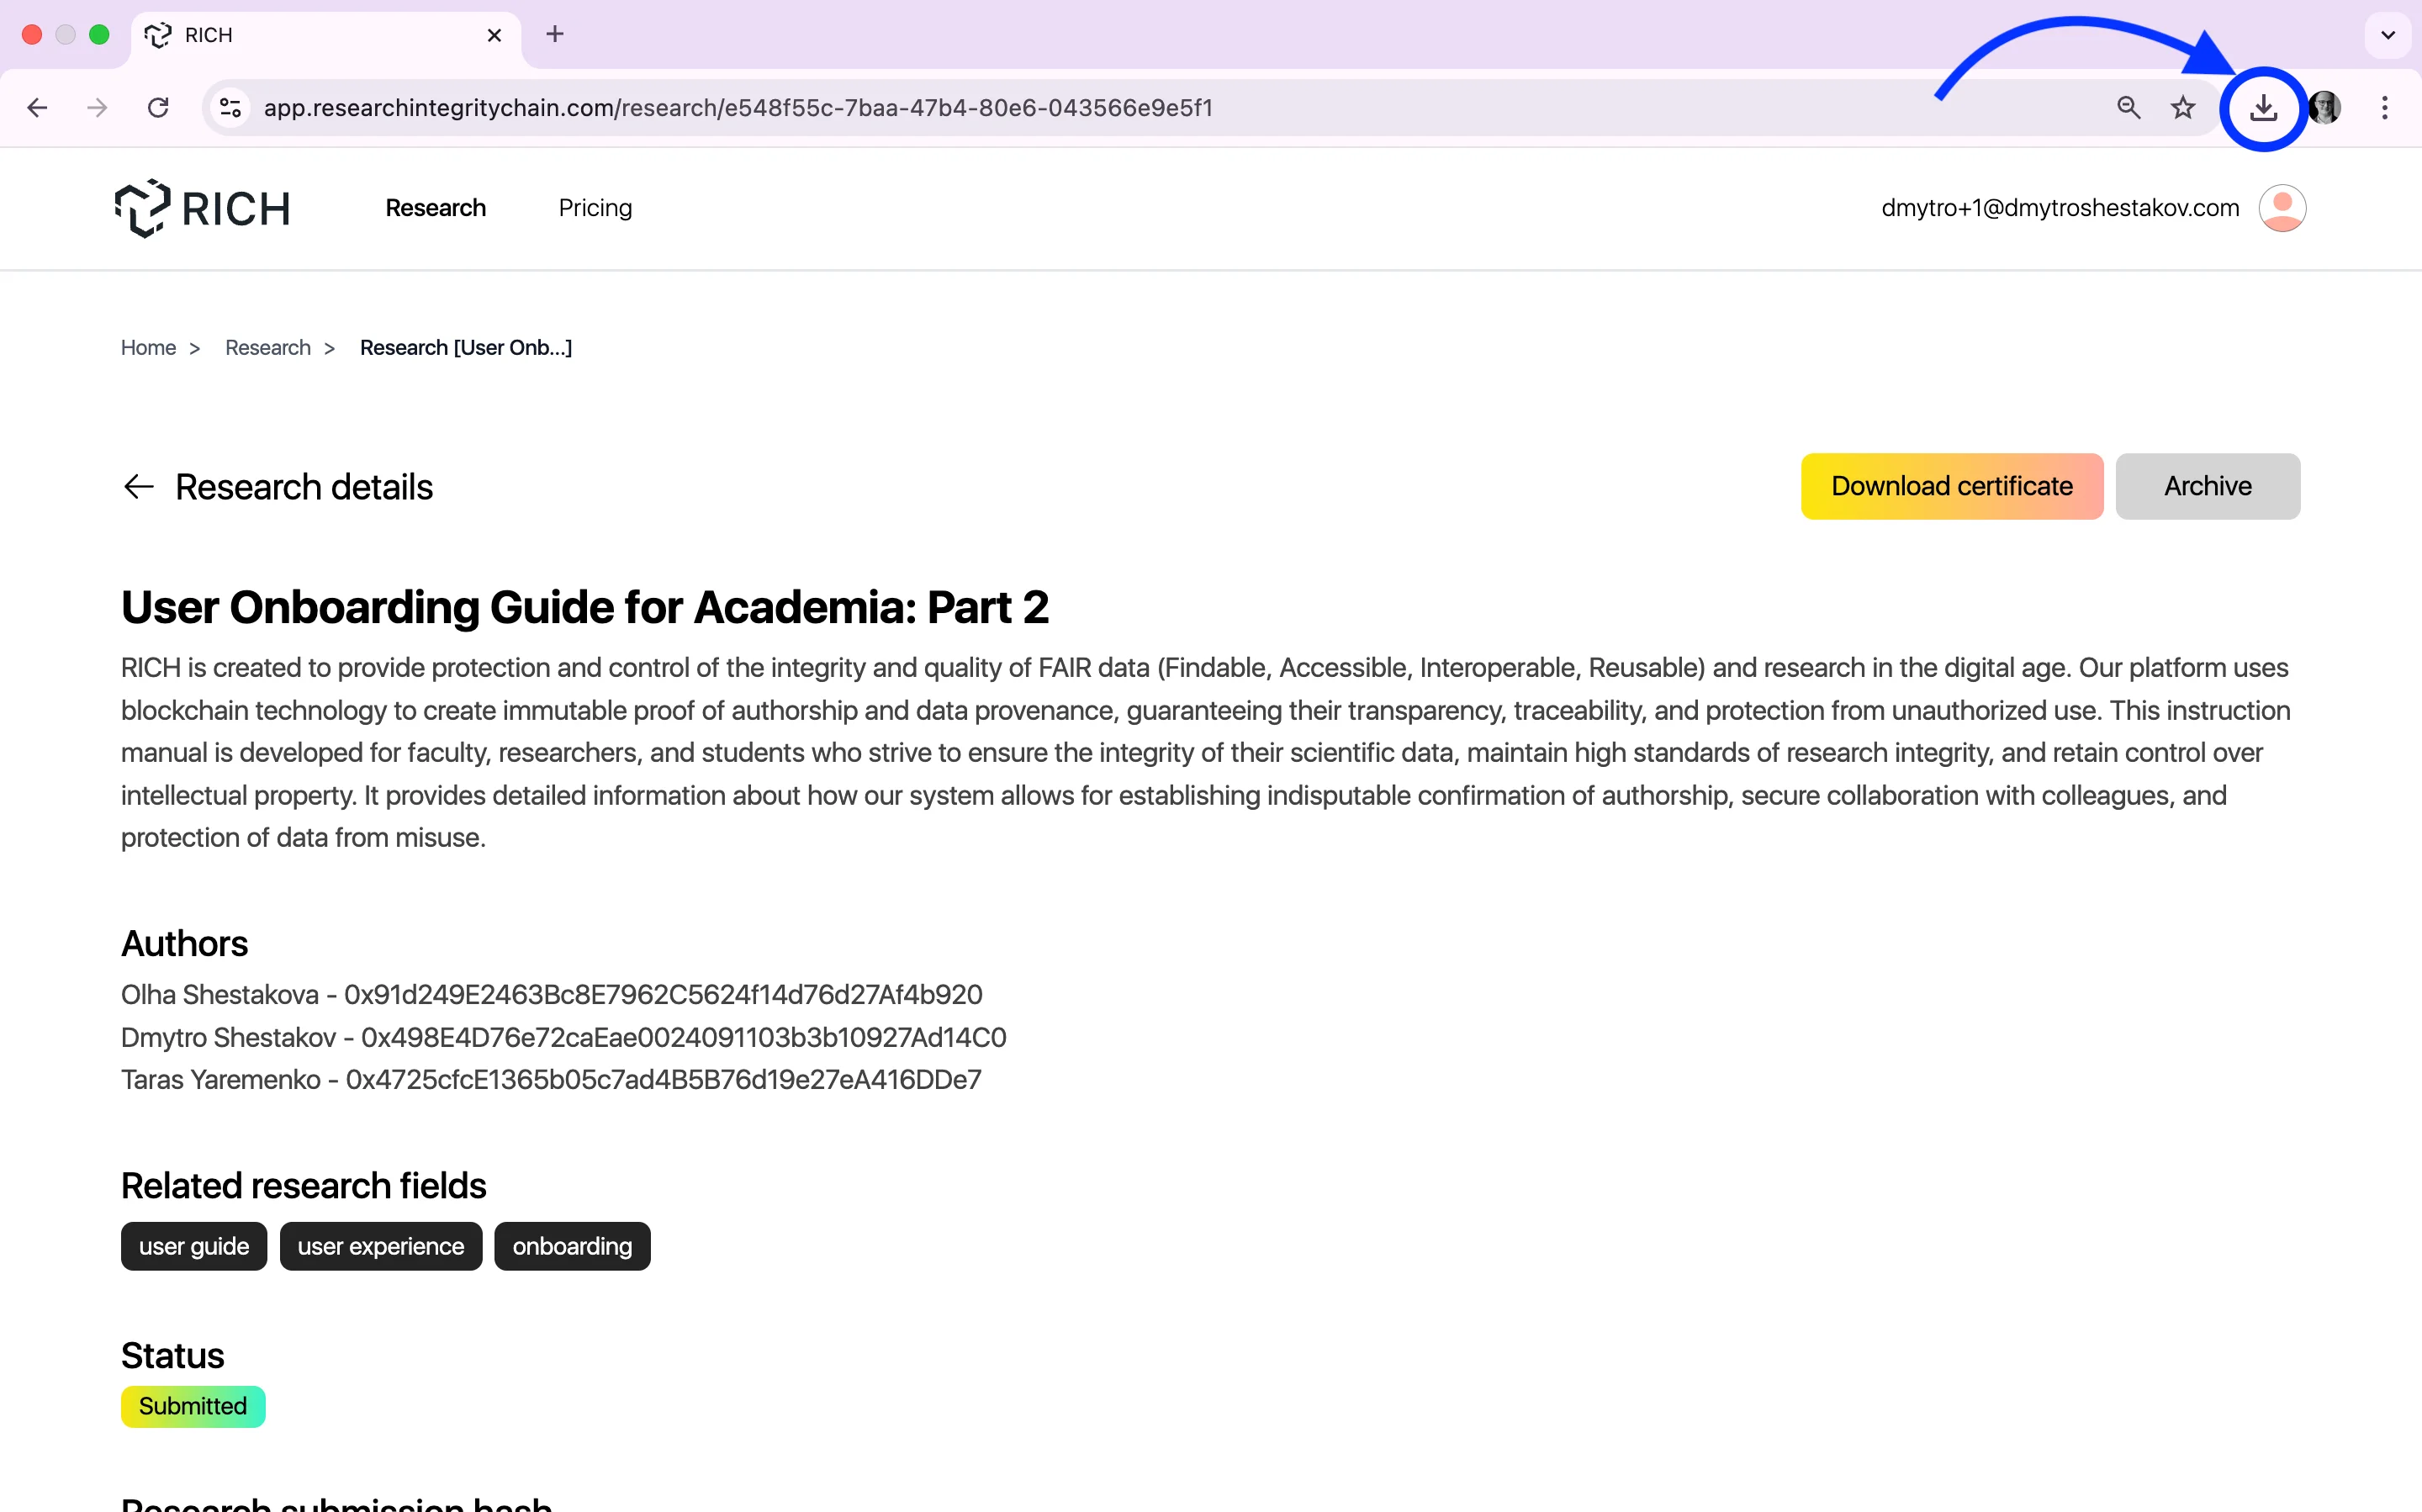
To download the PDF intellectual property certificate, on the selected project page click the "Download certificate" button.

Click the "Downloads" icon in your browser.
Open the downloaded certificate.

Sharing certificate ID code
To share the intellectual property certificate by ID code and public page with project metadata on the RICH website, on the selected project page click the "Download certificate" button, download and open the PDF certificate (see here), scan the "RICH" QR code of the certificate (bottom right).

Go to the corresponding link to the public project page with its metadata on the RICH website (https://app.researchintegritychain.com/research/user-certificate-ID, for example https://app.researchintegritychain.com/research/e548f55c-7baa-47b4-80e6-043566e9e5f1).
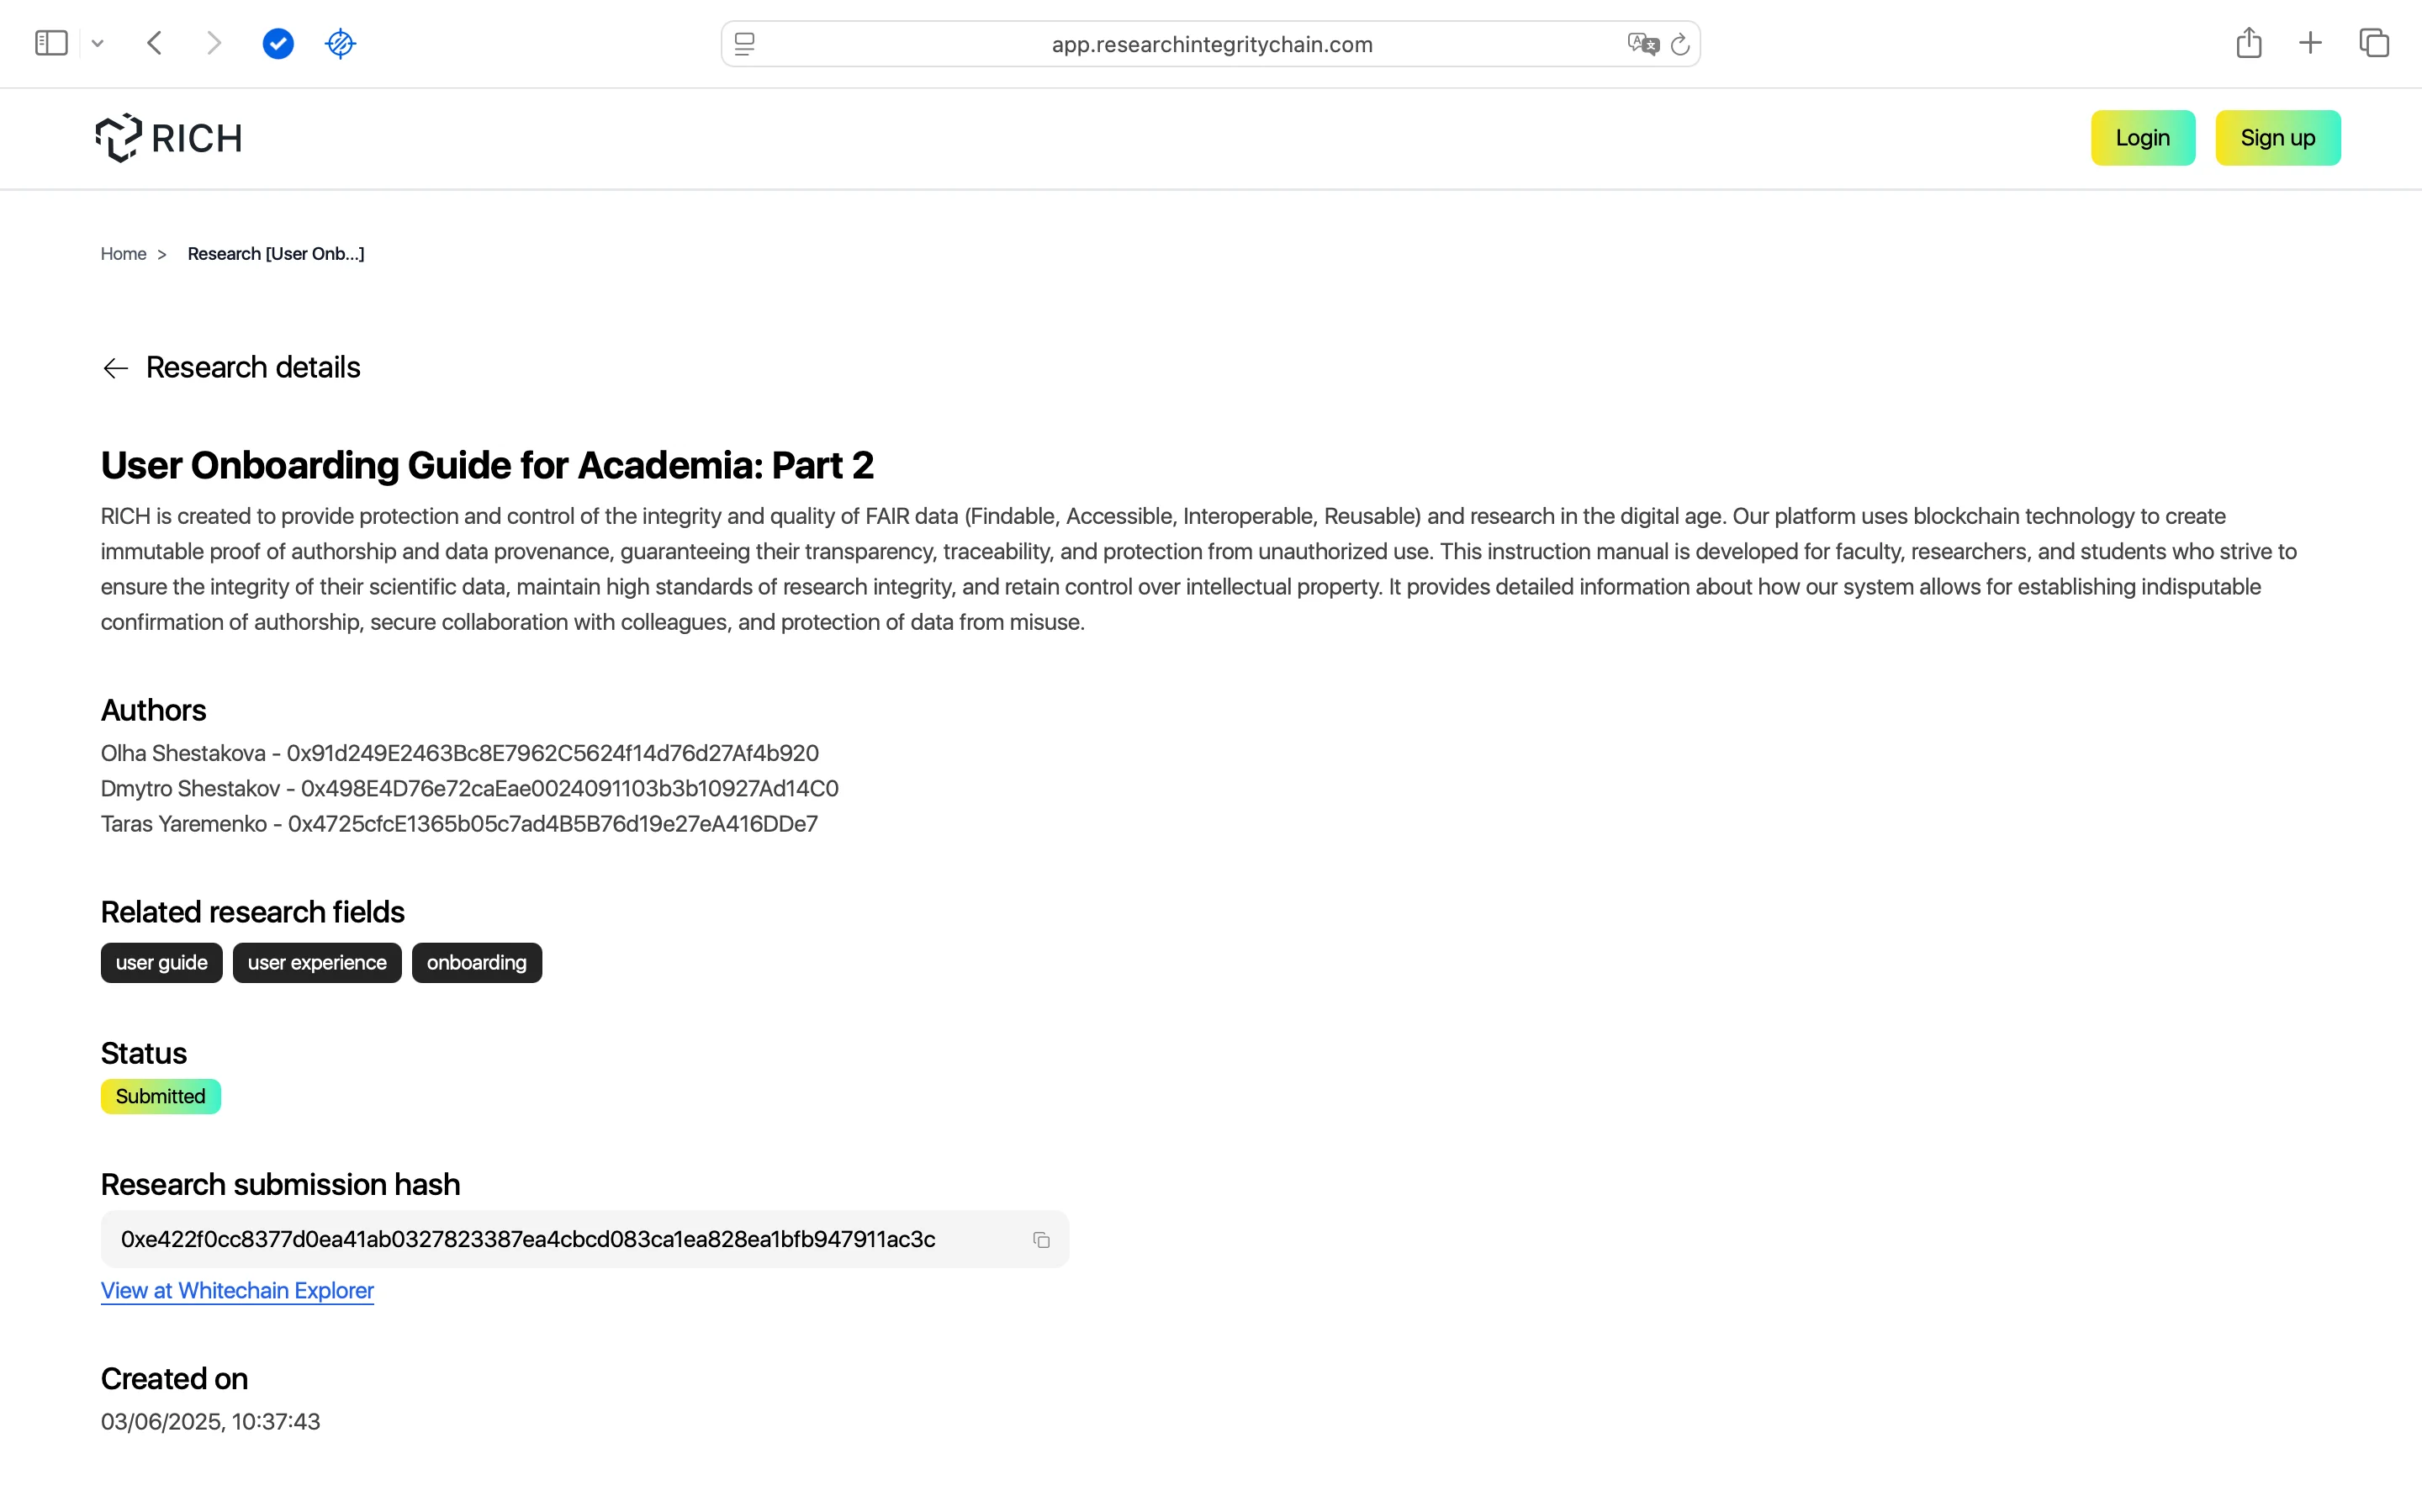
Copy the web address of your project certificate page for further sharing.
Sharing certificate NFT hash
To share the intellectual property certificate by NFT hash and public page with project metadata on the Whitechain Explorer website, on the selected project page click the "Download certificate" button, download and open the PDF certificate (see here), and scan the "Explorer" QR code of the certificate (bottom left).

Go to the corresponding link to the public project page with its metadata on the Whitechain Explorer website (for example https://explorer.whitechain.io/tx/0xe422f0cc8377d0ea41ab0327823387ea4cbcd083ca1ea828ea1bfb947911ac3c).

Copy the web address of your project certificate page for further sharing.
Alternatively, you can share the intellectual property certificate using the unique NFT hash in a shorter way: click "Details" on the selected research project card and on the project page go to the "View at Whitechain Explorer" link.

Verifying IPC (intellectual property certificate)
You can verify an intellectual property certificate (1) by its unique ID QR code on the RICH website, (2) by its NFT QR code and/or (3) NFT hash on the Whitechain Explorer website.
Verification by ID QR code
Scan the "RICH" QR code on the bottom right of the intellectual property certificate.
Go to the corresponding link to the public certificate page with its metadata on the RICH website (for example https://app.researchintegritychain.com/research/e548f55c-7baa-47b4-80e6-043566e9e5f1).
By scrolling down the public intellectual property certificate page you can view the metadata of its creation stages by clicking the "Details" button on the corresponding stage card.


Scan the "Explorer" QR code on the bottom left of the intellectual property certificate.
Go to the corresponding link to the public certificate page with its metadata on the Whitechain Explorer website (for example https://explorer.whitechain.io/tx/0xe422f0cc8377d0ea41ab0327823387ea4cbcd083ca1ea828ea1bfb947911ac3c).

On the certificate page, click the "Decode" button to see the token metadata address.

To verify the corresponding certificate metadata, copy the token address and paste it into the browser search bar in a new tab.

Verification by NFT hash
Go to Whitechain Explorer at https://explorer.whitechain.io/, copy the NFT hash of the certificate (for example"0xe422f0cc8377d0ea41ab0327823387ea4cbcd083ca1ea828ea1bfb947911ac3c"), paste it into the search window and click the "Enter" button.
To see the public metadata of the intellectual property certificate, see the instructions in the "Verification by NFT QR Code" section here.
7. Managing User Profile
To access the user profile, on the main dashboard, click the "Profile" icon in the header (top right).

Select "Profile" from the menu.

Personal information
To view user personal information, scroll down the "Personal information" tab on the https://app.researchintegritychain.com/profile page.

Billing information
To view subscription information and user limits, go to the "Billing information" tab on the https://app.researchintegritychain.com/profile page.

Editing personal information
To edit user personal information on the https://app.researchintegritychain.com/profile page, click the "Edit" icon to the right of the photo and user name.

Now you can change, add and/or delete necessary information about yourself.


8. Archiving a Project
⚠️ Remember! You can only archive projects for which you have issued an intellectual property certificate (IPC) (see here). You can always unarchive an archived project.
You can archive a project by (1) clicking "Details" or (2) the "Project menu" icon on the project card.

If you are archiving a project through "Details" and its page, click the "Archive" button.

If you are archiving a project through "Project menu" on the project card, click the "Archive" option. In both cases, confirm archiving by clicking the "Archive research" button.


Insights Unlocked: Intellectual Property
Discover essential insights for protecting your works

